RANO FL Study
This is the documentation for the Federated Learning Study conducted by RANO in collaboration with MLCommons.
| Home |
|---|
| Application Setup |
| Process the Data |
| Run the Application |
| Extras |
| (08/04/2025) Running Federated Training |
| Running Evaluation |
| Running Evaluation (CLI) |
| ITCR Connectivity |
Running Training
This guide assumes you finished preparing your dataset and reached this step. To start training, please follow the steps below.
Note: If you face “invalid refresh token” error, reauthenticate by logging out first then logging in again.
Important steps for the Final Model Training
For the final model training to happen smoothly without interruption, and to minimize your interaction with the software in the next 3 weeks, please do the following:
- Stop the currently running process by pressing CTRL+C on the terminal where you last run the training command.
- Delete the MedPerf logs to avoid any unexpected disk space shortage issue, by running the following:
rm ~/.medperf_logs/*
- To avoid login session expiration during the next 3 weeks, you should re-authenticate now. If you recall that the last time you logged in was less than a week ago, skip re-authentication. To re-authenticate, logout then login before you run step4, as follows (and follow instructions printed on the screen when you run the login command):
medperf auth logout
medperf auth login
- For steps 0, 1, 2, and 3 below, skip any step that you have already done.
- Go to the folder where you installed MedPerf (the
medperfrepository folder) and rungit pullto get the latest changes. - For step 4 below, make sure you use the
--restart_on_failureflag. We may change training configuration during the 3 weeks to test different models. If you don’t use the--restart_on_failureflag, you will have to manually restart the command when we change the configuration.
0. Change your MedPerf Branch and Re-install MedPerf
The new MedPerf code has been moved to a new branch. To update your MedPerf installation:
Go to the folder where you installed MedPerf (the medperf repository folder). Run the following (Don’t forget to activate your medperf virtual environment):
git remote add training https://github.com/hasan7n/medperf.git
git fetch training
git checkout -b fl-poc training/fl-poc
pip install -e ./cli --force-reinstall
1. Mark your dataset as Operational
(This command may take some time) Run the following command to mark your dataset as Operational (i.e., ready for training):
medperf dataset set_operational -d DATASET_ID
Replace DATASET_ID with your dataset ID. This command will calculate the hash of your prepared dataset and some statistics. You will be presented with this information, and will be prompted to confirm uploading them to the MedPerf server.
To recall, you can get your dataset ID by running medperf dataset ls --mine.

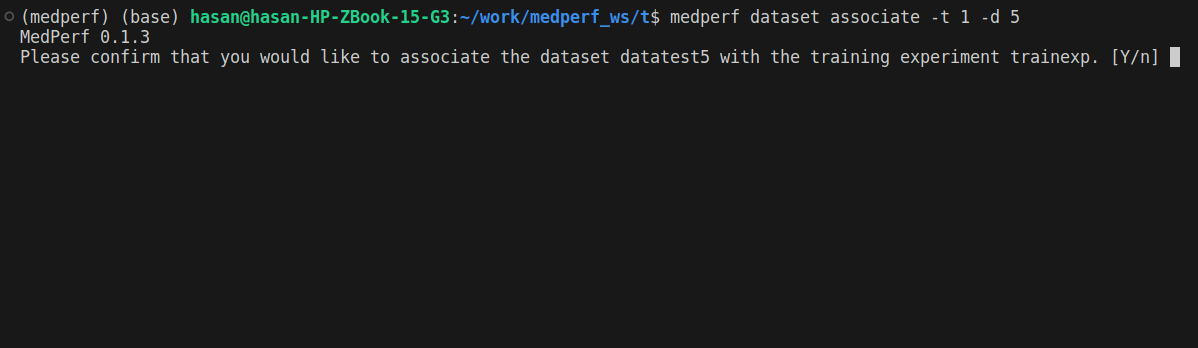
2. Associate your dataset with the training experiment
After marking your dataset as operational, run the following command so that your dataset is linked to the training experiment:
medperf dataset associate -t 1 -d DATASET_ID
Replace DATASET_ID with your dataset ID. You will be prompted to confirm.
3. Get a certificate
To be identified by the aggregation server, you will need to get a certificate. Run the following command:
medperf certificate get_client_certificate -t 1
You will be presented with a link and a 12-letters code:
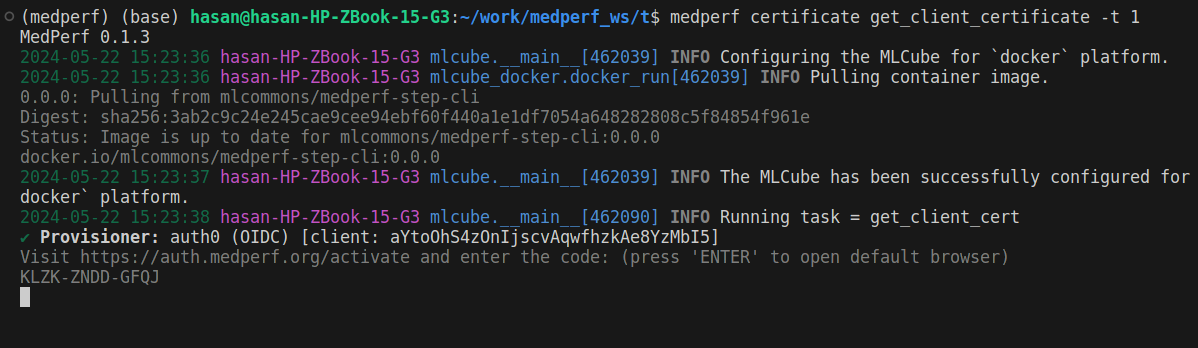
Copy the provided link https://auth.medperf.org/activate and paste it in your browser to open it. Then, copy the 12-letters code you have on your terminal (in the example screenshot above, it is KLZK-ZNDD-GFQJ). Paste this code in the form that you see when you opened the link, then click Continue. You will then see a page similar to the one below:
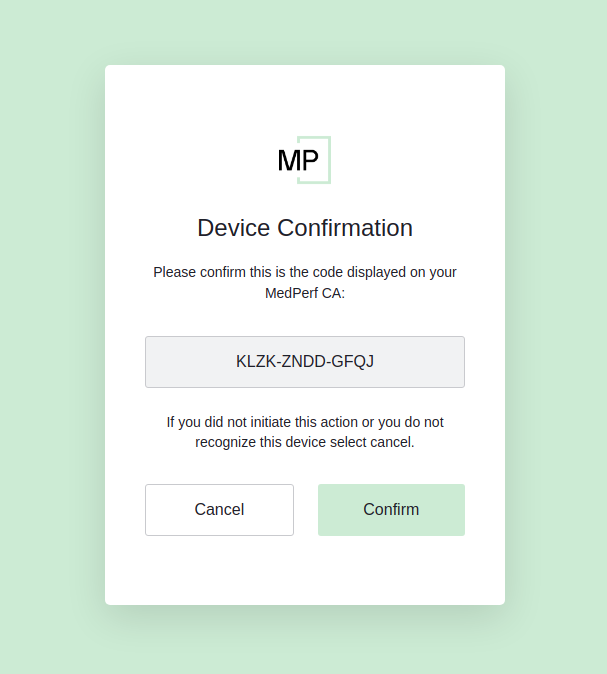
Double-check that this is the 12-letters code you copied and pasted. Then, click Confirm. The next steps are similar to the login flow that you have performed when you logged in to MedPerf. You will have to enter your email address and receive an 8-digits code in your inbox. At the end, you should see the following on your browser:

And you should see something similar to the screenshot below in your terminal:
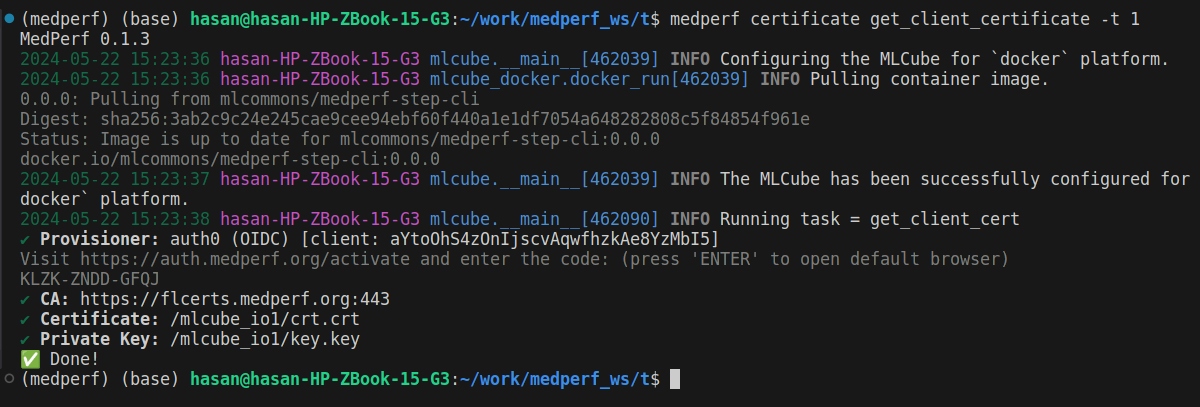
After this, you are ready to start the training process.
4. Start Training
4.1 Set the GPU if you haven’t already
If you want to use a GPU for training, follow the instructions found in this section if you haven’t done so already.
4.2 Start Training
You have the option to run training with --restart_on_failure flag, which means that the process will restart by itself if it encountered a failure, or if the experiment organizers change the training configuration. Note that this means the command will not wait for your approval on the training configuration, it will only ask you to confirm one time that you are OK with automatic restarts. Don’t use this flag if you didn’t test with us before and successfully trained for at least one round, otherwise you may not easily figure out that you have an error that needs our help.
Running the command in this section should be left running for a long period of time. Make sure that you can keep your terminal open without interruptions, or use tools like tmux to run the command in a terminal window that you can detach.
Now run the following command to start training: (Replace DATASET_ID with your dataset ID.)
medperf dataset train -t 1 -d DATASET_ID --restart_on_failure
If you want to skip the restart_on_failure confirmation prompt, use the following flag additionally --skip_restart_on_failure_prompt:
medperf dataset train -t 1 -d DATASET_ID --restart_on_failure --skip_restart_on_failure_prompt
If you don’t want to use --restart_on_failure, run this:
medperf dataset train -t 1 -d DATASET_ID --overwrite
If you didn’t use --restart_on_failure, you should first see something similar to the screenshot below, where you are presented with the configuration set by the training experiment owner and will be used throughout training:
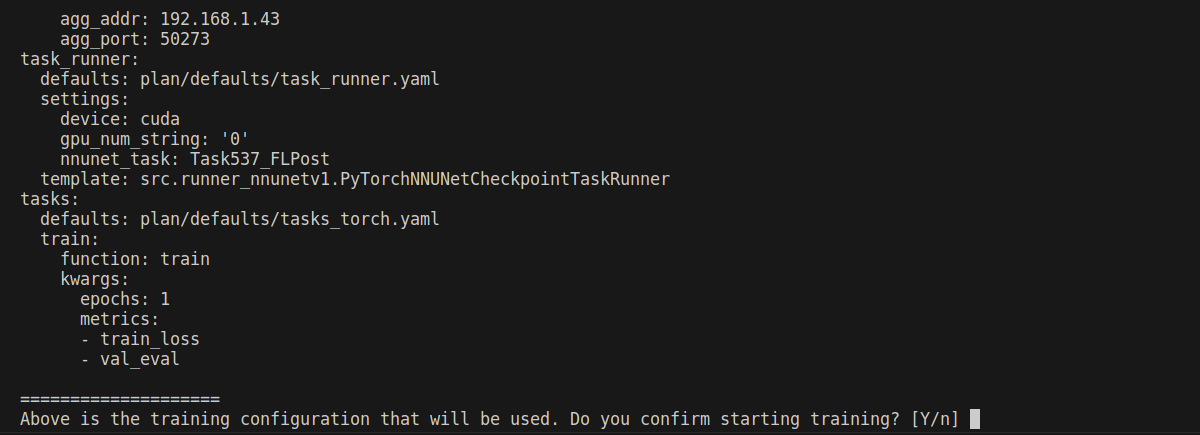
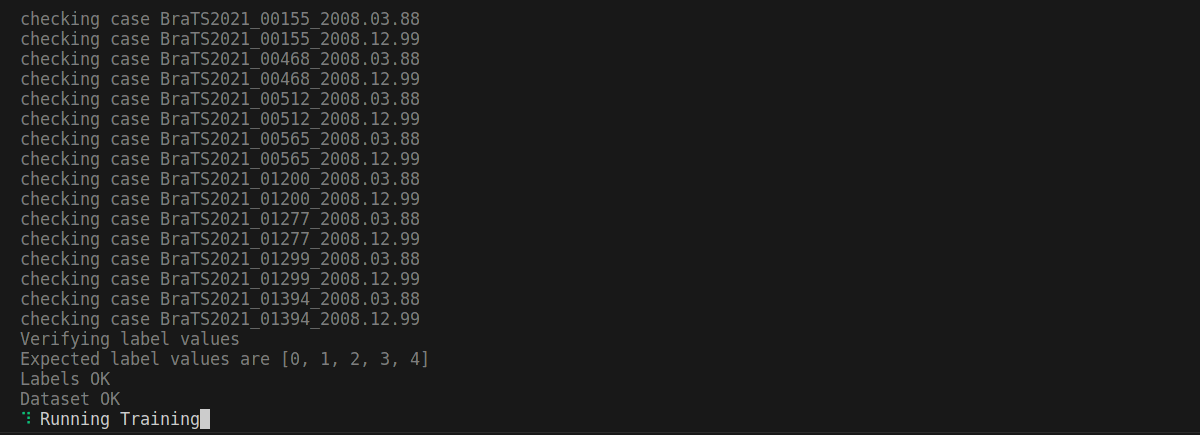
Confirm if you think everything looks good. Once you confirm, you will eventually reach a point where the training MLCube is downloaded successfully and your dataset is being preprocessed for training:
After some time, training will start. Please leave it running.