FeTS Platform
This is the documentation for the FeTS Platform, developed by CBICA at UPenn, in collaboration with Intel Labs, Intel AI and Intel IOT
| Home |
|---|
| Application Setup |
| Process the Data |
| Run the Application |
| Extras |
| ITCR Connectivity |
Running the Application
Note the ${fets_root_dir} from Setup.
Table of Contents
Application Path
cd ${download_location}
${fets_root_dir}/bin/FeTS # launches application
Please add the following path to your LD_LIBRARY_PATH when using FeTS: ${fets_root_dir}/lib:
export LD_LIBRARY_PATH=${fets_root_dir}/lib:$LD_LIBRARY_PATH
Inference
Inference using BraTS-winning algorithms
${fets_root_dir}/bin/FeTS_CLI_Segment -d /path/to/output/DataForFeTS \ # data directory after invoking ${fets_root_dir}/bin/PrepareDataset
  -a deepMedic,nnunet,deepscan,fets_singlet,fets_triplet \ # all pre-trained models currently available in FeTS see notes below for more details
  -lF STAPLE,ITKVoting,SIMPLE,MajorityVoting \ # if a single architecture is used, this parameter is ignored
  -g 1 \ # '0': cpu, '1': request gpu
  -t 0 # '0': inference mode, '1': training mode
The aforementioned command will perform the following steps:
- Perform inference on the prepared dataset based on selected architectures and label fusion strategies
- NOTES:
- nnUNet should have been downloaded during the installation process. In case there was a failure, follow these steps:
- Download weights from this URL or from the command line:
cd ${fets_root_dir}/data/fets wget https://upenn.box.com/shared/static/f7zt19d08c545qt3tcaeg7b37z6qafum.zip -O nnunet.zip unzip nnunet.zip - Unzip it in
${fets_root_dir}/data/fets. The directory structure should look like this:${fets_root_dir} │ └───data │ │ │ └──fets │ │ │ │ │ └───nnunet │ │ │ │ │ │ │ └───${training_strategy}.1_bs5 # the specific training strategy │ │ │ │ │ │ │ │ │ └───fold_${k} # different folds │ │ │ │ │ │ ... - This will now be available as a model for inference using the
FeTS_CLI_Segmentapplications under the-aparameter.
- Download weights from this URL or from the command line:
- To run DeepScan, at least 120G of RAM is needed.
- DeepMedic runs as a CPU-only task.
- nnUNet should have been downloaded during the installation process. In case there was a failure, follow these steps:
- NOTES:
- Leverage the GPU
- Place inference results on a per-subject basis for quality-control:
DataForFeTS
│
└───Patient_001 # this is constructed from the ${PatientID} header of CSV
│   │ Patient_001_brain_t1.nii.gz
│   │ Patient_001_brain_t1ce.nii.gz
│   │ Patient_001_brain_t2.nii.gz
│   │ Patient_001_brain_flair.nii.gz
│   │
│   └──SegmentationsForQC
│   │   │ Patient_001_deepmedic_seg.nii.gz # individual architecture results
│   │   │ Patient_001_nnunet_seg.nii.gz
│   │   │ Patient_001_deepscan_seg.nii.gz
│   │   │ Patient_001_fused_staple_seg.nii.gz # label fusions using different methods
│   │   │ Patient_001_fused_simple_seg.nii.gz
│   │   │ Patient_001_fused_itkvoting_seg.nii.gz
│
└───Pat_JohnDoe
│   │ ...
Inference using the FeTS Consensus Models
${fets_root_dir}/bin/FeTS_CLI_Segment -d /path/to/output/DataForFeTS \ # data directory after invoking ${fets_root_dir}/bin/PrepareDataset
  -a fets_singlet,fets_triplet \ # can be used with all pre-trained models currently available in FeTS
  -lF STAPLE,ITKVoting,SIMPLE,MajorityVoting \ # if a single architecture is used, this parameter is ignored
  -g 1 \ # '0': cpu, '1': request gpu
  -t 0 # '0': inference mode, '1': training mode
The aforementioned command will run inference using the FeTS Consensus models (both singlet and triplet) for the data directory specified by -d. The output will be placed in the directory specified by -o.
Manual Corrections
-
Use the FeTS graphical interface (or your preferred GUI annotation tool such as ITK-SNAP or 3D-Slicer) to load each subject’s images:

-
And each segmentation (either individual architectures or the fusions) separately:

-
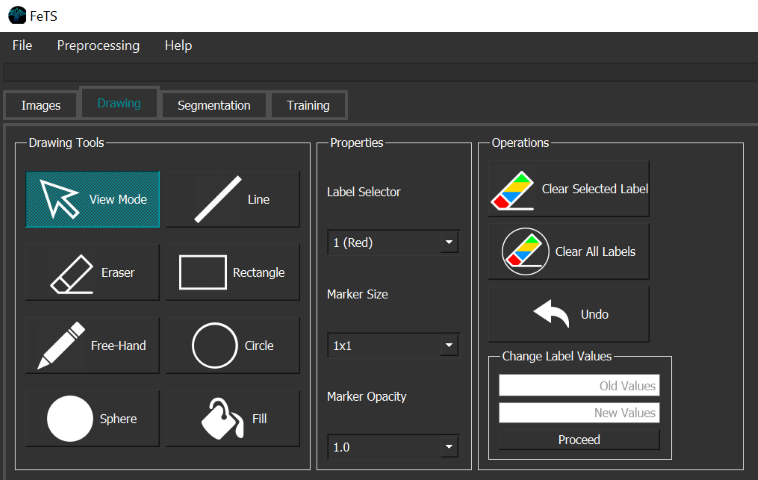
Perform quality control and appropriate manual corrections for each tumor region using the annotation tools:

- Ensure BraTS annotation protocol is followed for labels:
Label Region Acronym 1 Necrotic Core of Tumor NET 2 Peritumoral Edematous & Infiltrated Tissue ED 4 Enhancing/Active part of tumor ET -
Save the final tumor segmentation as
${SubjectID}_final_seg.nii.gzunder the subject’s directory:DataForFeTS │ └───Patient_001 # this is constructed from the ${PatientID} header of CSV │ │ Patient_001_brain_t1.nii.gz │ │ Patient_001_brain_t1ce.nii.gz │ │ Patient_001_brain_t2.nii.gz │ │ Patient_001_brain_flair.nii.gz │ │ Patient_001_final_seg.nii.gz # NOTE: training will not work if this is absent!!! │ └───Pat_JohnDoe │ │ ...- NOTES:
- This file is is used during training and the subject will be skipped if this is absent
- A video example is here: https://www.dropbox.com/s/6p62ztqf7ckoial/FeTS_refinements_tutorial.mp4?dl=0
- NOTES:
Sanity Check
Before starting final training, please run the following command to ensure the input dataset is as expected:
cd ${fets_root_dir}/bin
./OpenFederatedLearning/venv/bin/python ./SanityCheck.py \
  -inputDir /path/to/output/DataForFeTS \
  -outputFile /path/to/output/sanity_output.csv
Note: If you are running FeTS version 0.0.2 (you can check version using FeTS_CLI --version), please do the following to get the SanityChecker for your installation:
cd ${fets_root_dir}/bin
wget https://raw.githubusercontent.com/FETS-AI/Front-End/master/src/applications/SanityCheck.py
Phase-2 Intensity Check
During discussions with some of the collaborating sites, we note negative values randomly coming up in the pre-processed scans. To identify these cases, we have now put together an additional script to assess all pre-processed images for the negative values and provide relevant statistics. This can be run in the following manner:
cd ${fets_root_dir}/bin
wget https://raw.githubusercontent.com/FETS-AI/Front-End/master/src/applications/Phase2_IntensityCheck.py
./OpenFederatedLearning/venv/bin/python ./Phase2_IntensityCheck.py \
  -inputDir /path/to/output/DataForFeTS \
  -outputFile /path/to/output/intensity_check.csv
If /path/to/output/intensity_check.csv doesn’t get generated, that means the dataset is completely fine, otherwise, please send the file to admin@fets.ai for debugging.
Training
Ensure Sanity Checking Is Done
Proceed to training once sanity check (↑) is successfully finished.
Transfer Certificates
If you have a signed certificate from a previous installation, ensure they are copied before trying to train:
cd ${fets_root_dir}/bin/
cp -r ${fets_root_dir_old}/bin/OpenFederatedLearning/bin/federations/pki/client ./OpenFederatedLearning/bin/federations/pki
Start Training
${fets_root_dir}/bin/FeTS_CLI -d /path/to/output/DataForFeTS \ # input data, ensure "final_seg" is present for each subject
  -c ${collaborator_common_name} \ # common collaborator name created during setup
  -g 1 -t 1 # request gpu and enable training mode
The aforementioned command will perform the following steps:
- Train a model with a 3DResUNet architecture (more architectures will be made available in future releases) for all the complete subjects (i.e., with
${SubjectID}_final_seg.nii.gzand all 4 structural modalities present) in a collaborative manner - Leverage the GPU
- Perform full-image validation during training